 Save to Pinterest
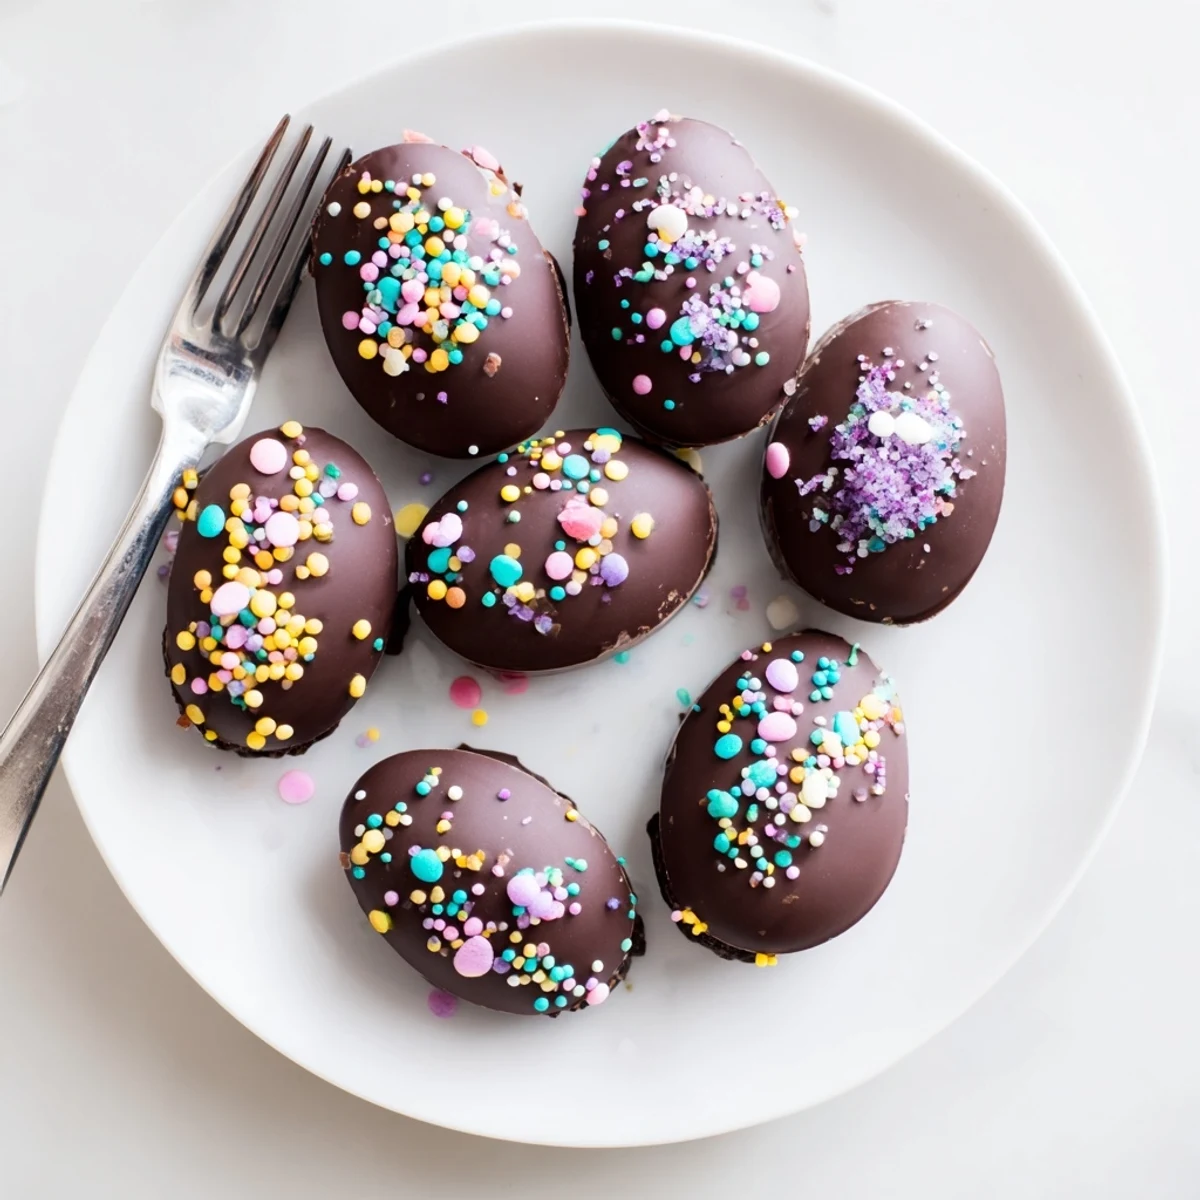
 These delightful egg-shaped treats combine the classic flavors of Oreo cookies and cream cheese, dipped in smooth chocolate for a festive spring dessert. The no-bake preparation makes them accessible for bakers of all skill levels, while the simple shaping process creates impressive results.
Start by crushing whole Oreos into fine crumbs, then blend with softened cream cheese until a thick, uniform dough forms. Shape the mixture into egg forms and chill until firm. Dip each egg in melted chocolate, allowing excess to drip off, then decorate with colored candy melts or sprinkles before the coating sets.
These treats freeze beautifully for advance preparation and stay fresh in the refrigerator for up to a week, making them ideal for Easter gatherings, spring parties, or as edible gifts. Kids love helping with the decorating process, adding colorful sprinkles and edible glitter for personalized touches.
Last spring, my niece announced she was hosting her first Easter brunch and wanted something spectacular. I'd been making these Oreo truffles for years, but shaping them like eggs felt like discovering a whole new way to spread joy. We spent an entire Saturday afternoon in the kitchen, chocolate coating our fingerprints and scattering sprinkles across every available surface. The best part was watching her face light up when she saw the finished tray glistening on the counter.
I first attempted these with white chocolate coating and pastel sprinkles, trying to match a Pinterest-worthy aesthetic. Honestly, they looked a bit messy, but my family couldnt stop eating them anyway. Since then, I've learned that imperfect drizzles and asymmetrical sprinkles just make them feel more homemade and loved.
Ingredients
- 36 Oreo cookies: One standard package works perfectly, and I've found that processing them with the filling intact creates that fudgy texture everyone loves
- 8 oz cream cheese, softened: Room temperature cream cheese blends seamlessly into the crushed cookies, so leave it out for about an hour before starting
- 12 oz semi-sweet or white chocolate: Semi-sweet provides classic flavor contrast, but white chocolate creates that gorgeous Easter egg look
- Colored candy melts: These transform simple treats into festive spring decorations, though plain chocolate tastes just as delicious
- Sprinkles and decorations: Let your creativity run wild because everything sticks better before the chocolate fully sets
Instructions
- Prepare your workspace:
- Line a baking sheet with parchment paper before you start mixing, because you'll need somewhere to place the eggs as soon as they're shaped
- Crush the cookies:
- Pulse the entire Oreos, filling and all, in a food processor until you achieve fine, uniform crumbs that resemble damp sand
- Form the dough:
- Add the softened cream cheese and blend until everything comes together into a thick, dark mixture that holds its shape when pressed
- Shape into eggs:
- Scoop about tablespoon portions and gently roll them into oval egg shapes, placing each one on your prepared baking sheet as you work
- Chill thoroughly:
- Freeze the shaped eggs for at least 30 minutes, because firm centers are essential for clean dipping later
- Melt the chocolate:
- Heat your chocolate in 20-second intervals, stirring between each, until completely smooth and glossy
- Dip and decorate:
- Lower each chilled egg into the melted chocolate using a fork, tap gently to remove excess coating, then return to the parchment paper
- Add final touches:
- Sprinkle decorations immediately while the chocolate is still wet, or drizzle with colored candy melts for extra flair
- Set completely:
- Refrigerate for at least 15 minutes until the coating is firm, then serve chilled or let them sit briefly at room temperature
 Save to Pinterest
 My neighbor's kids now request these every year, and the tradition has somehow become non-negotiable. Last Easter, we set up a decorating station with bowls of sprinkles and let everyone customize their own eggs. The kitchen looked like a glitter bomb had gone off, but those messy memories are exactly what make holidays meaningful.
Making Them Ahead
You can prepare the shaped Oreo eggs up to two days in advance, keeping them tightly wrapped in the freezer. This actually improves the texture and makes dipping day much more manageable. Just let them sit at room temperature for about five minutes before coating, as slightly thawed centers hold chocolate better than frozen ones.
Coating Secrets
The temperature of your chocolate makes all the difference between smooth and disappointing results. If it's too hot, the coating runs thin and reveals dark spots underneath. Too cool, and it clumps thickly around your eggs. Aim for chocolate that feels barely warm to the touch, like perfectly hot bathwater.
Storage Solutions
These keep beautifully in the refrigerator for up to a week, though they rarely last that long in my house. Layer them between wax paper in an airtight container to prevent sticking. For gifting, place each egg in a mini cupcake liner inside a decorative box, and they'll look like something from a fancy chocolate shop.
- Consider packaging them in clear egg cartons for an especially festive presentation
- A bit of edible glitter transforms them into something truly magical
- Remember to label them clearly if gifting to anyone with allergies
 Save to Pinterest
 There's something deeply satisfying about turning simple cookies into something that feels genuinely special. Happy Easter, and may your kitchen always be covered in sprinkles.
Recipe FAQs
- → Can I make these Oreo balls ahead of time?
-
Yes, these egg-shaped treats freeze beautifully. Prepare and coat them up to 2 weeks ahead, then thaw in the refrigerator before serving. They also keep well in the refrigerator for up to 1 week in an airtight container.
- → What type of chocolate works best for coating?
-
Semi-sweet chocolate chips or chopped baking chocolate provide a classic flavor that complements the sweet Oreo filling. White chocolate creates a striking contrast and allows for colorful decorating. Candy melts also work well and come in vibrant spring colors.
- → Do I need to remove the cream filling from the Oreos?
-
No, keep the cream filling intact when crushing the Oreos. The filling helps bind the mixture together with the cream cheese, creating the perfect dough-like consistency for shaping. Pulse the entire cookies in your food processor until fine crumbs form.
- → How do I get smooth, egg-shaped forms?
-
Chill the dough mixture for about 15 minutes before shaping to make it easier to handle. Use slightly dampened hands to prevent sticking and roll gently into oval shapes. The mixture should feel firm but pliable. If it becomes too soft, return it to the refrigerator briefly.
- → Can I customize the flavor of these treats?
-
Absolutely! Try using Golden Oreos for a vanilla-based version, or experiment with flavored Oreos like mint or peanut butter. You can also incorporate extracts like almond or peppermint into the cream cheese mixture, or use different types of chocolate for coating including milk or dark chocolate.
- → What's the best way to melt chocolate for dipping?
-
Melt chocolate in a microwave-safe bowl in 20-second intervals, stirring between each to prevent overheating and seizing. Alternatively, use a double boiler on the stovetop. The chocolate should be smooth and fluid but not extremely hot when dipping the chilled Oreo eggs.
