 Save to Pinterest
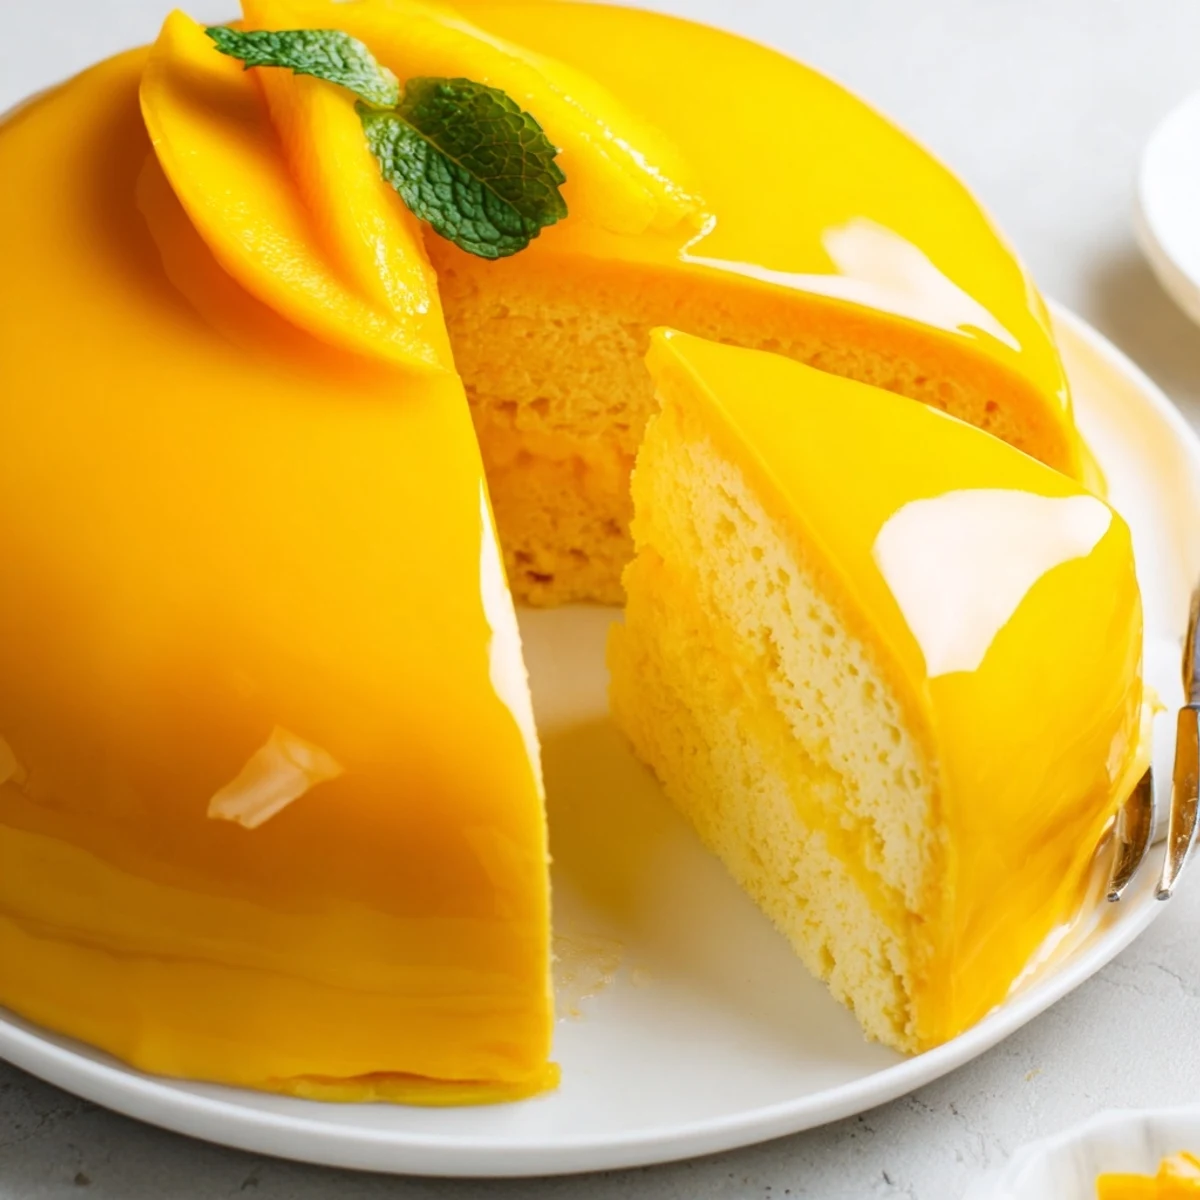
 This elegant mango mousse cake combines a tender vanilla sponge base with silky smooth mango mousse and a glossy mirror glaze. The dessert achieves perfect balance between sweet tropical mango puree and light whipped cream, set with gelatin for structure. Professional techniques like properly blooming gelatin and folding whipped cream ensure restaurant-quality results at home.
The assembly requires patience with chilling times but rewards with stunning presentation and refreshing flavors ideal for warm weather gatherings.
The first time I attempted this mango mousse cake, it was a sweltering July afternoon and my kitchen had no air conditioning. I remember watching the mousse through the oven door glass as it set, wondering if the humidity would ruin everything. Instead, that cake became the highlight of our backyard dinner party, with friends going silent after their first bites.
My grandmother always said the best desserts make people pause mid conversation, and this one does exactly that every single time. I served it at my sisters birthday last year, and she still talks about how the glaze caught the candlelight perfectly.
Ingredients
- 3 large eggs at room temperature: Temperature matters here cold eggs wont whip properly and your sponge will be dense
- 90 g granulated sugar: This amount sweetens the sponge just enough without competing with the mango
- 90 g all-purpose flour: Sift it twice to avoid any lumps in your tender base
- 1/2 tsp vanilla extract: Pure vanilla makes a noticeable difference in the final flavor
- Pinch of salt: Enhances all the other flavors without making it taste salty
- 400 g ripe mango flesh pureed: Choose mangoes that give slightly to pressure and smell fragrant at the stem
- 60 g granulated sugar: Adjust slightly based on your mangoes natural sweetness
- 2 tbsp lemon juice: Brightens the mango flavor and helps balance the rich cream
- 1 tbsp unflavored gelatin powder: This is what gives the mousse its structure without making it rubbery
- 300 ml heavy cream cold: Very cold cream whips faster and holds air better for the lightest texture
- 150 g mango puree: Strain it through a fine mesh for the smoothest glaze possible
- 1 tbsp lemon juice: Keeps the glaze from being too sweet and adds shine
- 1 tbsp granulated sugar: Just enough to balance the tanginess of the glaze
- 1.5 tsp unflavored gelatin powder: Creates that gorgeous mirror like finish on top
- Fresh mango slices mint leaves: These are optional but they make the cake look absolutely stunning
Instructions
- Preheat and prep your pan:
- Set your oven to 180°C (350°F) and line just the bottom of a 23 cm springform pan with parchment paper. Do not grease the sides this helps the sponge climb upward as it bakes.
- Make the sponge base:
- Beat eggs and sugar with an electric mixer until the mixture is pale and has tripled in volume which takes about 5 minutes. Gently fold in the flour salt and vanilla until just combined then pour into your prepared pan and bake for 12 to 15 minutes. The cake is done when a toothpick inserted in the center comes out clean and it springs back lightly when touched. Cool completely in the pan before adding the mousse layer.
- Bloom the gelatin:
- Sprinkle 1 tablespoon of gelatin powder over 3 tablespoons of cold water and let it sit for 5 minutes until it absorbs all the liquid. Gently heat the bloomed gelatin until it dissolves completely but do not let it boil or it will lose its setting power.
- Create the mango mousse:
- Blend the mango puree sugar and lemon juice until completely smooth then stir in the dissolved gelatin while it is still warm. Whip the heavy cold cream to soft peaks and fold it gently into the mango mixture until no white streaks remain.
- Assemble the first layer:
- Pour the mango mousse over the completely cooled sponge base and smooth the top with an offset spatula. Refrigerate for at least 2 hours until the mousse is firm and set to the touch.
- Prepare the glaze:
- Bloom the remaining gelatin in 2 tablespoons of cold water for 5 minutes then heat gently until dissolved. Mix the mango puree lemon juice and sugar in a bowl then stir in the dissolved gelatin until fully combined.
- Add the glaze and finish:
- Let the glaze cool to room temperature then pour it carefully over the set mousse layer. Chill for at least 2 more hours until the glaze is completely firm then run a knife around the edge of the pan and release the springform ring. Decorate with fresh mango slices and mint leaves if desired and serve chilled.
 Save to Pinterest
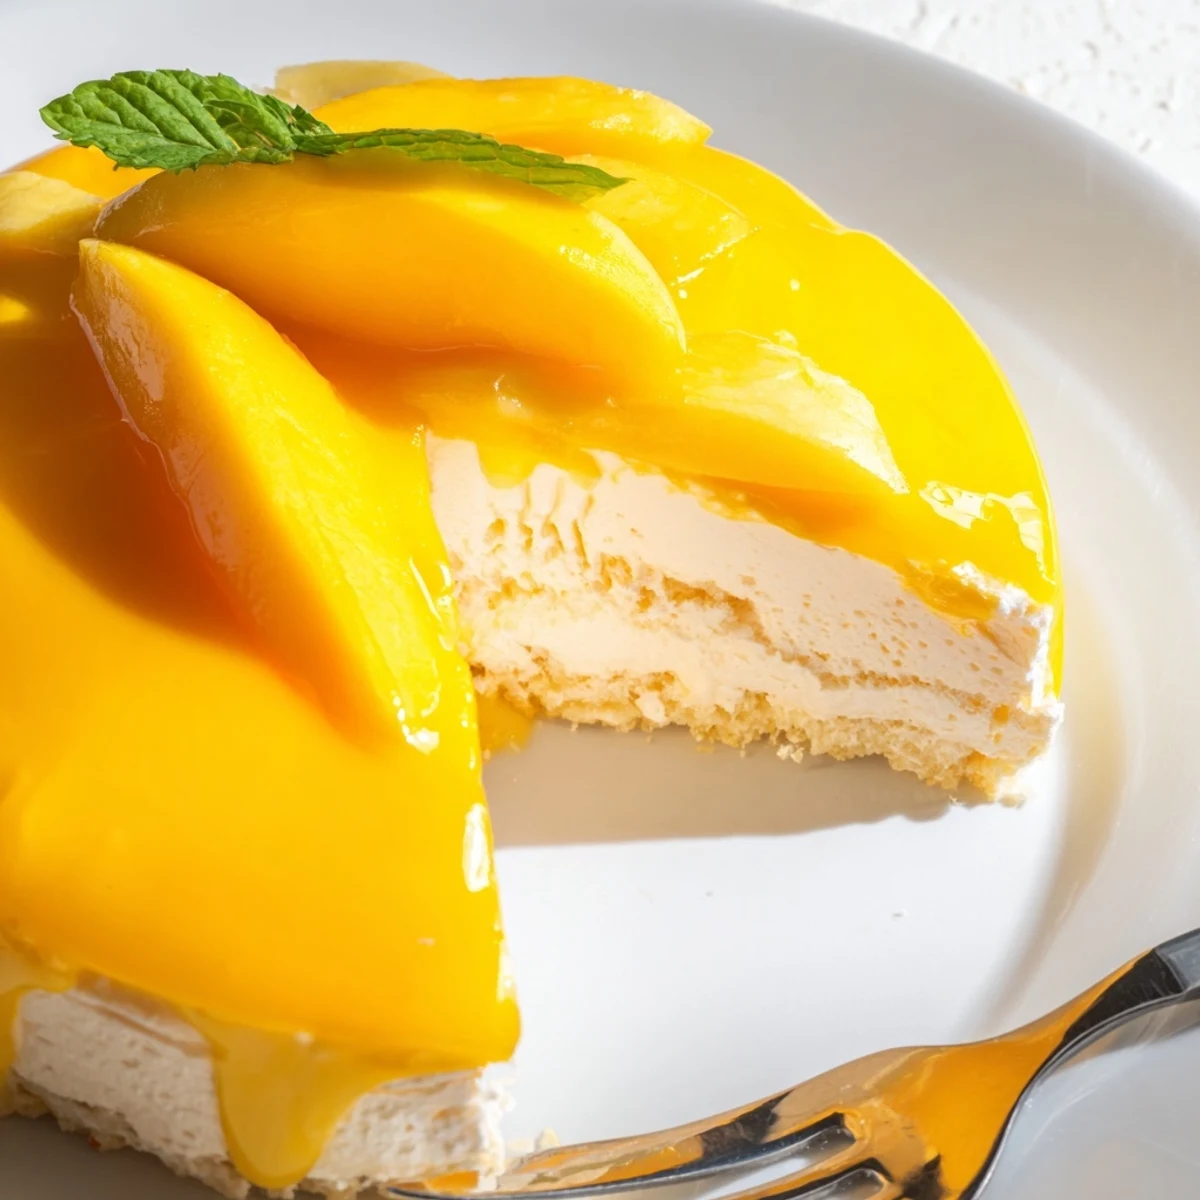
 There is something magical about slicing into this cake and seeing those perfect layers reveal themselves. It is become my go to for summer birthdays because it feels special without weighing everyone down.
Making It Ahead
This cake actually tastes better when made a day ahead because the flavors have time to meld together beautifully. You can prepare the entire cake up to 2 days in advance just keep it loosely covered in the refrigerator.
Working With Gelatin
If you have never worked with gelatin before do not be intimidated by the blooming step. It simply means letting the gelatin absorb the liquid so it can dissolve evenly without forming lumps in your mousse.
Serving Suggestions
This mango mousse cake needs nothing more than a sharp knife and a few moments to soften slightly after coming out of the refrigerator. Use a hot knife dipped in warm water for the cleanest slices.
- Serve with a glass of Moscato dAsti for an elegant pairing
- A dollop of unsweetened whipped cream on the side balances the sweetness perfectly
- This cake is best served slightly chilled rather than ice cold
 Save to Pinterest
 Every time I make this cake I am reminded that some of the best desserts are the ones that look complicated but come together with patience and good ingredients. Enjoy every bite of summer in this cake.
Recipe FAQs
- → Can I use frozen mango instead of fresh?
-
Yes, frozen mango chunks work well when thawed and drained thoroughly. The puree quality remains excellent for both mousse and glaze layers.
- → How long does the cake need to chill?
-
The mousse layer requires at least 2 hours to set properly. After adding the glaze, chill for 2 additional hours until firm. For best results, prepare a day ahead.
- → What size pan should I use?
-
A 23 cm (9-inch) springform pan works perfectly. The removable sides make releasing the layered cake without damage much easier.
- → Can I make this gluten-free?
-
Simply substitute the all-purpose flour in the sponge base with a quality gluten-free flour blend. The texture remains light and tender.
- → How should I store the finished cake?
-
Keep refrigerated in an airtight container or covered with plastic wrap. The cake stays fresh for 3-4 days when properly chilled.
