 Save to Pinterest
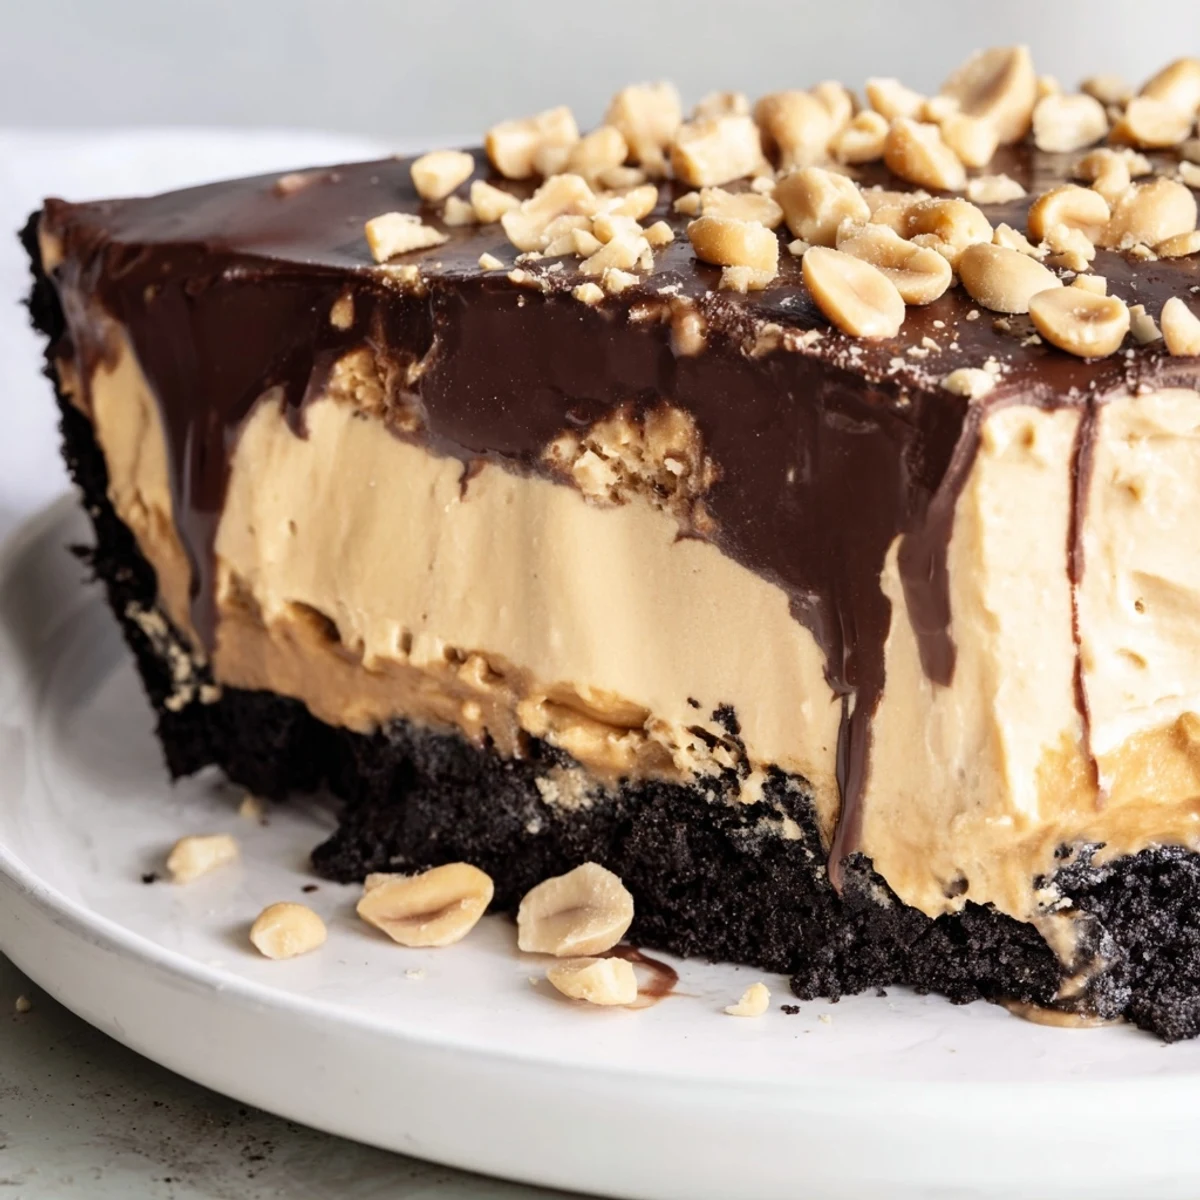
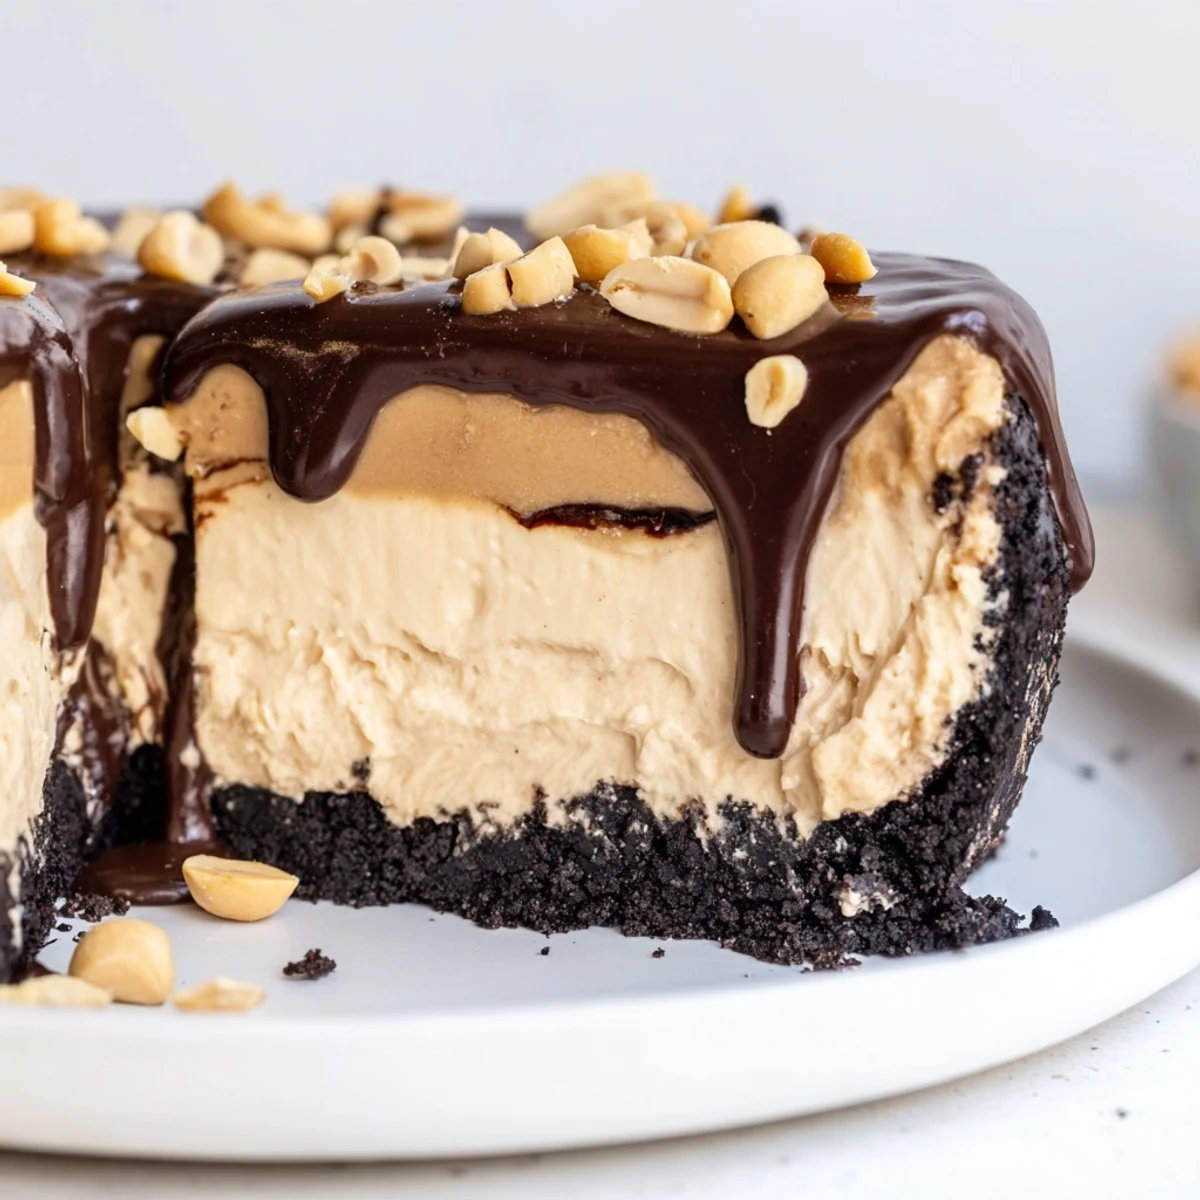
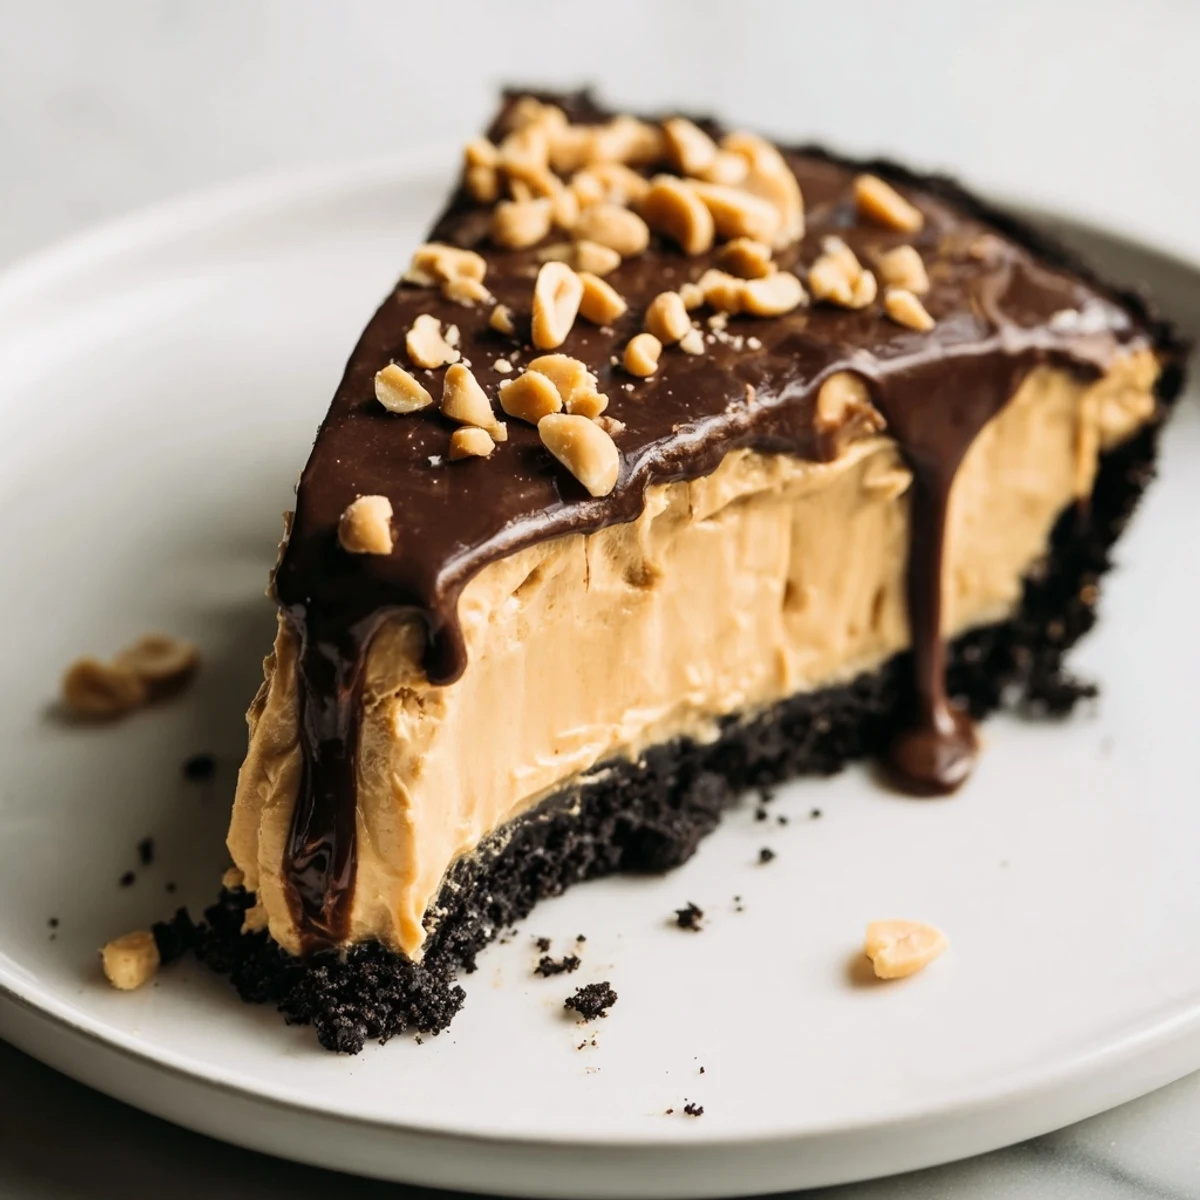
 This luscious peanut butter pie features a silky smooth filling made with creamy peanut butter, cream cheese, and whipped cream, all nestled in a crunchy chocolate cookie crust. The entire no-bake preparation takes just 20 minutes of active time before chilling to set.
Perfect for entertaining or weeknight treats, this American classic dessert serves eight generously. The optional chocolate ganache topping adds an extra layer of indulgence, while chopped peanuts provide a satisfying salty crunch. Simply chill for at least four hours and slice into this creamy, dreamy dessert.
The first time I made this peanut butter pie, my husband took one bite and declared it better than our local bakery's version. I'd thrown it together on a Wednesday evening after work, using ingredients I already had in the pantry. That's the beauty of this recipe, it feels impressive but comes together with almost zero effort. Now it's my go-to whenever I need to bring dessert to a gathering.
Last summer I brought this pie to a Fourth of July barbecue and watched it disappear within minutes. My friend's kids, who usually bounce around after eating sugar, went completely quiet while devouring their slices. That's when I knew this recipe was something special. The combination of rich peanut butter and chocolate crust hits this perfect nostalgic note that appeals to everyone from toddlers to grandparents.
Ingredients
- 200 g chocolate sandwich cookies: I've learned that crushing these with their filling intact gives you the perfect texture, no need to scrape anything out
- 75 g unsalted butter, melted: Let this cool slightly after melting so it doesn't soften the cookie crumbs too much before pressing
- 240 g creamy peanut butter: Room temperature makes everything blend smoother, just give it 10 minutes out of the fridge
- 225 g cream cheese: Definitely let this soften completely, cold cream cheese creates those annoying lumps that ruin the silky texture
- 120 g powdered sugar: This isn't just for sweetness, it helps stabilize the filling so it holds its shape beautifully
- 240 ml heavy cream: Cold cream whips faster and holds air better, I even put my bowl in the freezer for 5 minutes first
- 1 tsp pure vanilla extract: Pure vanilla makes such a difference here, imitation can leave a strange aftertaste in something this simple
- 60 ml heavy cream for ganache: The optional topping takes this from great to absolutely unforgettable
- 60 g semi sweet chocolate chips: Good quality chocolate matters since it's not masked by other ingredients
Instructions
- Build the chocolate crust foundation:
- Process those cookies into fine crumbs, then stir in melted butter until every piece is coated like wet sand. Press the mixture firmly into your pie dish, using the bottom of a measuring cup to really compact it. Pop it in the fridge to set while you make the magic filling.
- Create the silkiest peanut butter base:
- Beat the peanut butter, cream cheese, and powdered sugar until completely smooth, scraping the bowl a few times to catch any pockets. In another bowl, whip that cold cream with vanilla until you have stiff peaks that hold their shape when you lift the beater.
- Gently bring everything together:
- Fold the whipped cream into your peanut butter mixture in three additions, being careful not to deflate all that air you just whipped in. Spread it into your waiting crust and smooth the top with an offset spatula or the back of a spoon.
- Add the optional chocolate crown:
- Heat the cream until it's steaming but not boiling, pour over chocolate chips, and let it sit for two full minutes before stirring until glossy. Spread this over the peanut butter layer and sprinkle with peanuts if you want that extra crunch.
- Exercise the hardest step:
- Let the pie chill for at least four hours, though overnight is even better. The filling needs this time to set properly so each slice holds its shape beautifully.
 Save to Pinterest
 This pie has become such a staple in my house that my daughter requested it for her birthday instead of cake. Watching her face light up when she saw that familiar chocolate crust peeking out from under the foil made me realize how much food memories really do matter. Now whenever I smell melted chocolate and peanut butter together, I'm transported back to those kitchen moments we've shared over this simple dessert.
Making It Your Own
I've started playing with different crust variations when I want to shake things up. Pretzel crusts add this incredible salty sweet contrast that pairs perfectly with the rich peanut butter filling. Graham cracker crusts work beautifully too, giving you something that reminds me of those classic peanut butter cups from childhood.
Serving Suggestions
While this pie is perfect on its own, I love serving it with a small drizzle of warm salted caramel and a few extra peanuts scattered on top. The contrast between the cold creamy filling and that warm caramel sauce is absolutely worth the extra five minutes. Sometimes I'll even add a scoop of vanilla ice cream on the side for the full sundae experience.
Storage And Make Ahead Tips
This pie actually gets better after sitting overnight, so it's perfect for making the day before you need it. The flavors have time to meld together and the texture becomes even more mousse like and luxurious. Store it covered in the refrigerator where it will keep happily for up to five days.
- Set a timer when whipping the cream, over whipped cream will turn into butter and ruin that silky texture
- Use a hot knife dipped in water for perfectly clean slices that look restaurant quality
- Let the pie sit at room temperature for about 10 minutes before serving for the ideal creamy texture
 Save to Pinterest
 There's something so satisfying about serving a dessert that looks this impressive but comes together with such minimal effort. Every time I bring this pie somewhere, I inevitably get asked for the recipe, which is always the best compliment.
Recipe FAQs
- → How long does the pie need to chill before serving?
-
The pie requires at least 4 hours of chilling time in the refrigerator to fully set. For the best results, you can make it the night before and let it chill overnight. The filling firms up beautifully, making clean slices easy to serve.
- → Can I use natural peanut butter instead of regular?
-
Regular creamy peanut butter works best as it contains stabilizers that help the filling hold its shape. Natural peanut butter with separated oil may result in a softer texture. If you only have natural peanut butter, consider reducing the heavy cream slightly and chilling for longer.
- → What can I use instead of chocolate sandwich cookies for the crust?
-
Oreo cookies work perfectly, but you can also use chocolate graham crackers, vanilla wafers mixed with cocoa powder, or even digestive biscuits. For a gluten-free version, simply choose certified gluten-free chocolate cookies. The butter-to-crumb ratio remains the same.
- → How should I store leftovers?
-
Cover the pie dish tightly with plastic wrap or transfer slices to an airtight container. Store in the refrigerator for up to 5 days. The crust may soften slightly over time but the flavor remains delicious. For longer storage, individual slices freeze well for up to 2 months.
- → Can I make this pie ahead for a party?
-
Absolutely, this pie is perfect for advance preparation. Make it up to 2 days before your event and keep it refrigerated. Add the optional ganache topping and chopped peanuts the day you plan to serve it for the freshest presentation. The flavors actually develop and improve after chilling.
- → What variations can I try with this dessert?
-
Swap creamy peanut butter for crunchy to add texture throughout the filling. Try mixing mini chocolate chips into the peanut butter layer, or drizzle with melted peanut butter and chocolate sauce. For a lighter version, substitute part of the cream cheese with Greek yogurt while maintaining the creamy consistency.
